Import from BIBID v1
This is a Technical (IT) Instructions topic
Contents
Importing Records from BIBID v1
The BIBID Import process needs to be completed before any user activity on the database.
It will import and convert your BIBID records into the new iBID database format. It creates all the necessary patient and ibid database records, perform data analysis calculations and performs the latest "version 2" validation checks.
Pre-requisites
You must have registered your IBID database before the BIBID Data Transfer options become available. See [Installing AquilaCRS] for more information.
Due to the high level of processing needed, it is recommended that you select a modern PC with a high quality network connection. Ideally the process should be run on the server that hosts the new IBID database. Hardware recommendations:
- Modern dual core processor
- Minimum 2Gb RAM.
You can import data from your older BIBID database if your new iBID v2 database meets the following criteria
- You have no iBID records already manually entered into your database
- You have registered your iBID Unit ID and it must match the Unit ID in the BIBID database.
- Ensure you have access to www.bibid.org.uk & www.nbid.org on the pc you're using (the new software uses these sites to retrieve updates)
Step 1: Start the Import
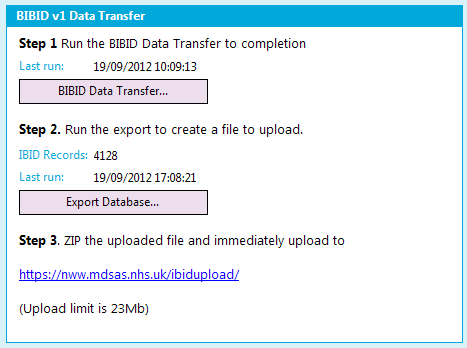
Log onto IBID as an Administrator and go to the IBID Installation and Setup tab.
Click BIBID Data Transfer to start the import process.
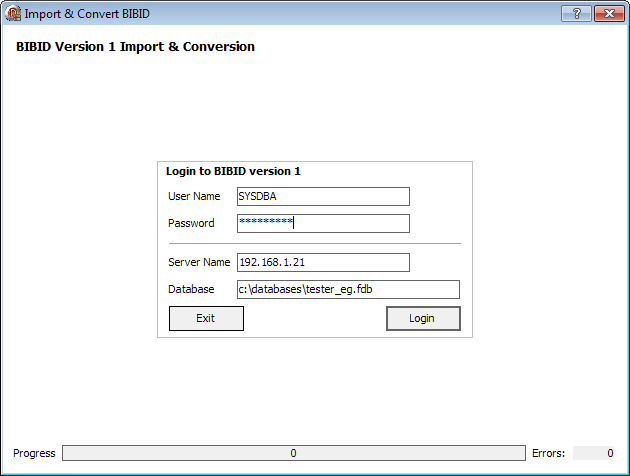
Step 2: Log in to BIBID v1 via the Data Transfer Software
You now need to log into BIBID using the SYSDBA user profile. (You are already logged into iBID). If you need the SYSDBA password please contact Cathy Reade at Wythenshawe.
Step 3: Run the Import
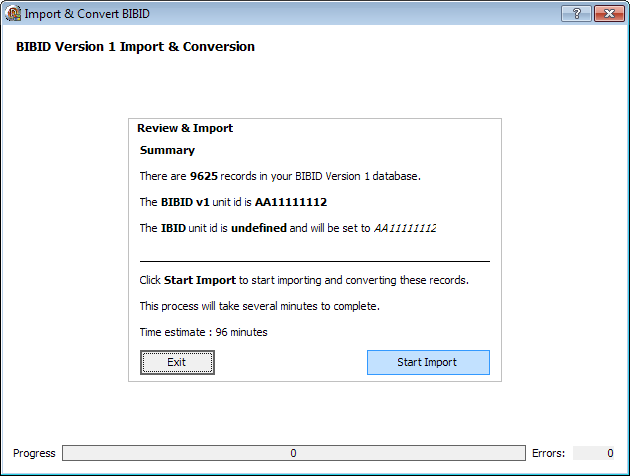
Once you're logged into BIBID, you will see the start screen that summarises the import process. This process will take some considerable time depending on the number of records you have in your BIBID database, the specification of the PC you're using & your network conditions.
It is advisable to ensure that your laptop is connected to a power outlet.
Click "Start Import" and the records will start to import and be converted into the new format.
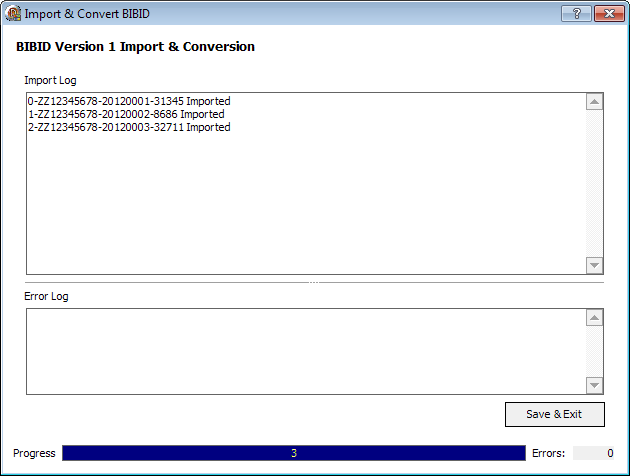
Step 4: Confirm the Import was Successful
In the event of any errors during import, please record the precise wording of any errors that may appear on screen. Any data errors will appear in the error log that should be sent to us. See below.
Reporting Errors
In the event of any errors, or if you're a beta test site, please attach the log files to an email & send to support@evohelpdesk.co.uk for analysis.
The log files are saved to your "My Documents" folder and are:
- BIBID_Import_Log.txt
- BIBID_Import_Error_Log.txt
Step 5: Export and Upload to the National Database
Run Step 2 and Step 3 on the IBID Installation and Setup page
Contact Details
Contact details in the event of problems:
Cathy Reade: 0161 291 6323 / cathy.reade@uhsm.nhs.uk Stuart Clennett: 01964 503 400 / stuart@evolutionhealthcaresystems.co.uk


